Announcement

Collapse
No announcement yet.

Mike's Cabrio Build

Collapse
X
 
  • Filter
  • Time
  • Show
Clear All
new posts

  • Mike's Cabrio Build

    Many of us probably have a story to tell about why we wanted to build a car,and why we chose a Marlin.
    For me it started around 7 or 8 years old. My Dad built me a JAP engined Go-kart with solid rubber tyres that I could chug around our grass fields, (and local lanes when I thought no-one was looking!). Later, he fitted a single cylinder Triumph Tiger Cub. As a teenager the "need for speed" was met with a BSA 250cc twin and pneumatic barrow tyres!
    By the time I reached 17, and still at school, I had somehow survived a year on a Garelli Tiger Cross moped (50mph was possible in those days!), and traded it for a beaten up old Mini. A year later I had completely repaired, restored, and re-sprayed it (in cellulose), and eventually, using nothing but elbow grease and T-cut polished it up until it was one of the better "young lads" Minis in the area.

    At University the idea of building my own car took hold, and I promised myself I would have a go one day. A 1950s Citroen 15 Light had always hit the spot for me: so 10 years later when I saw one of the early Black & White Marlin adverts for a Berlinetta I was hooked. However, a trip to Stoneleigh in 1988 convinced me the Roadster was more affordable (for a newly married), and the Triumph / Marina Hybrid meant I could use the gorgeous straight six from the Triumph Vitesse, and its double wishbone front suspension. I quickly had a rolling chassis and engine installed.

    Then "family life" took over for 6-7 years as we built our own house, and had three children along the way!

    When I emerged from the other side of this exciting, but time consuming, part of my life, I began reading Kit car magazines again: but they were all full of the impending doom threatened by SVA! I only had a few months to avoid it! A chance conversation with a mate who was an MOT inspector told me it was not as difficult as I thought to get a car through the MOT test. He set out the barest of essentials for a vehicle to legitimately pass the test, and with in a few weeks it duly passed the test! In those days we only required a valid MOT, log book, and a trip (on a trailer) to the local DVLA office to get a car registered. I had my Marlin Roadster properly registered, road legal.

    But of course it was not finished, and money was tight for a few years, so it did not progress further.

    Later, as I guess happens with so many of these builds, I began to think about finishing it off. Life had been kind but taken its toll physically, and I found myself thinking I still wanted to build my own car, but wanted something more comfortable, modern, and economic than a Roadster, that Sue & I could tour France, Italy and Spain in after the children had progressed to University. Marlin's new Cabrio had grown on me - it had been designed to accept the much newer Sierra suspension, and would accommodate the pre-requisite 6 cylinder engine: not the Triumph, but this time a much more modern and economic fuel injected 2.5 litre 192HP BMW M50 - it would be perfect!
    There was talk at Marlin of the Cabrio being developed to take the BMW 3 series as its single donor, which I really liked the idea of, but knowing them of old I preferred not to be their "customer guinea pig", and chose the safer* option of the Sierra based Cabrio.

    So here follows the build of my Cabrio.

    It is not intended to be definitive, all kit cars are by their nature different. I hope it helps anyone interested make that leap of faith, whether its to take on the rebuild of a Cabrio, or any other Marlin, or to buy a new Marlin kit; I hope to some it may offer a guide and help supplement the infamous "Marlin manual"!

    I have enjoyed the build process enormously, and learned a lot more about "using computers" than I could have imagined when I set out. It has also connected me to so many other builders with whom I have been able to share problems and develop ideas, both through this Forum and the Madabout Kit Cars site. I can thoroughly recommend it to anyone with a modicum of engineering know how, a bit more common sense, and a lot of determination!

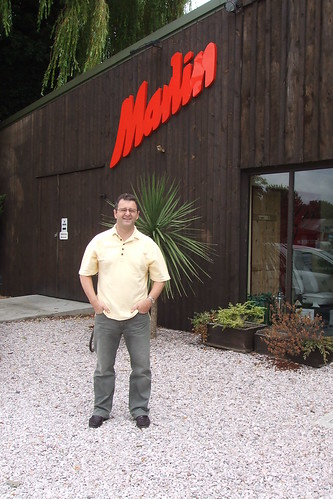
    Yours truly visiting the Marlin factory in Crediton to see where it all went on.


    November 2005 I ordered my kit: Sierra based, but with the Marlin hydraulic clutch pedal box to suit my choice of engine - BMW M50TUB25 2.5 litre straight 6 with modern fuel injection, taken from a 1993 325i.

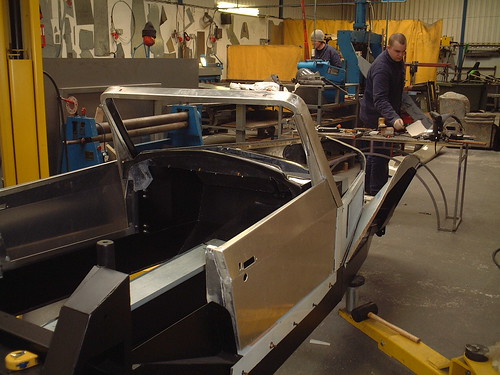
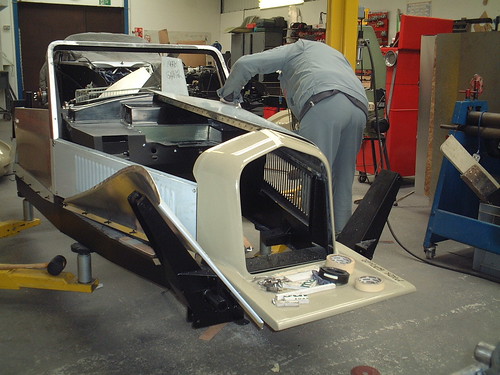
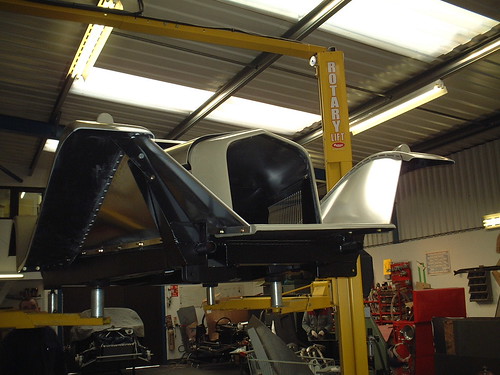
    This is my chassis with doors being trial fitted at the factory, early in 2006.
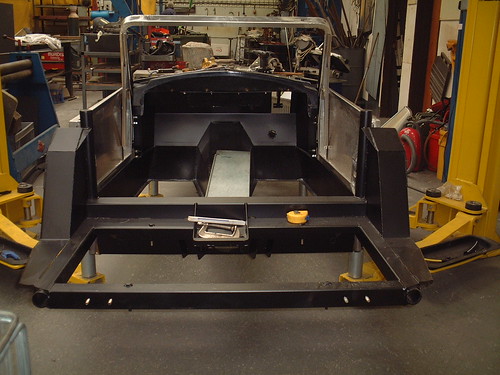


    * - there is no 'totally safe' option with Marlin, as you will come to see later!
    Last edited by Mike; 15-04-13, 02:24 PM.

  • #2
    Re: Mike's Cabrio Build

    Before I took delivery of my kit, my boss handed in his notice, and I was offered his job. Great opportunity to run the company, but suddenly a load of extra hours every week. So, I decided to ask Marlin to trial fit the body panels, as my Roadster build experience told me this was time consuming, and Marlin would have the experience to do it well.....(or so I thought!)

    (Factory Photos - courtesy of Marlin Engineering)

    Doors should always be fitted before the rear tub is located to ensure the panel gaps are parallel and even.


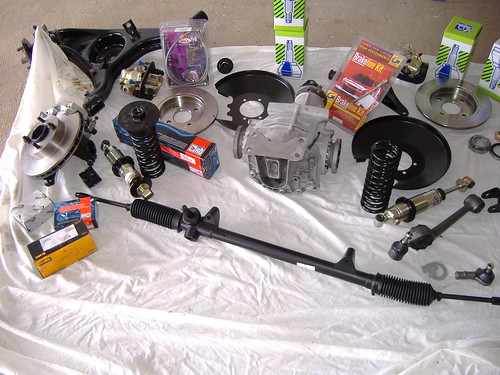
    Whilst Marlin were manufacturing my chassis I bought a Sierra Ghia 2.0 auto Saloon as it had disc brakes at the rear, along with stronger Lobro drive shafts, and I felt the auto would have given the diff an easier life. I would not be using the Ford engine or gearbox, so these could be sold to cover the cost of the car.
    My new job meant I had a bit more money to play with, so I started acquiring some refurbished replacements for the mechanical parts which were subject to wear, and refurbishing the donor parts wherever I felt it prudent to do so.

    I was like a kid at Christmas with all my new toys!


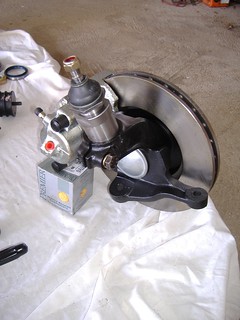
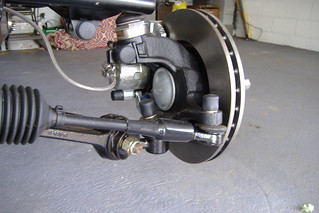
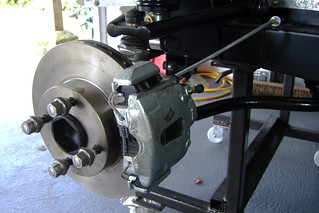
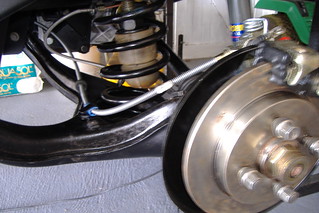
    Marlin discard the MacPherson strut, and replace it with a special socket machined to receive a Metro top ball joint, which attaches to a top wishbone. I also chose to upgrade the front discs to larger Cosworth vented discs and calipers.


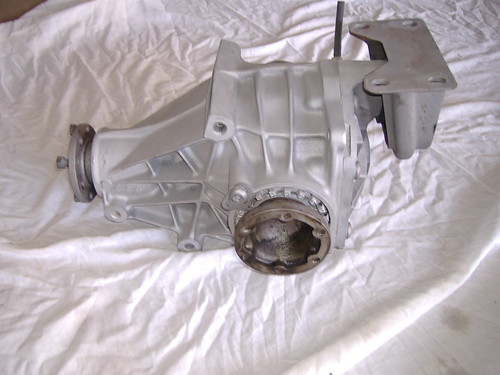
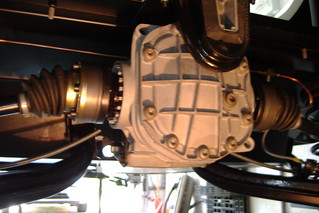
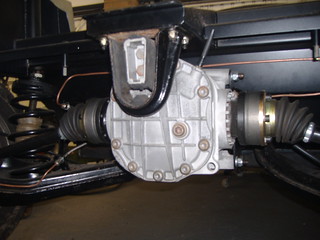
    This was my 3.62 diff after I had sand blasted it clean. If you have a go yourself with a cheap machine, as I did, be prepared to use a lot of bags of sand if you don't have sand recycling! - and for a beach to appear on your drive!

    Last edited by Mike; 03-04-13, 07:26 PM.

    Comment


    • #3
      Re: Mike's Cabrio Build

      This is brilliant Mike! Lots of reference photos of a car with it's "clothes off" are also so useful for checking prior to starting repairs / upgrades ourselves.

      BTW where do the brake disc splash guards fit? Rear or front? Looks like the holes ar for the rear traiing arm flanges? I haven't got them in either position on my Hunter! Peter.

      Comment


      • #4
        Re: Mike's Cabrio Build

        Here here, Peter. This is brilliant, more please.

        Terry

        Comment


        • #5
          Re: Mike's Cabrio Build

          Originally posted by greyV8pete View Post
          This is brilliant Mike! Lots of reference photos of a car with it's "clothes off" are also so useful for checking prior to starting repairs / upgrades ourselves.

          BTW where do the brake disc splash guards fit? Rear or front? Looks like the holes ar for the rear traiing arm flanges? I haven't got them in either position on my Hunter! Peter.
          The stone guard/splash pans are for the rear brakes as you suspected. They are not essential, but I guess are there to stop small stone chips etc getting in between the pads and the discs? Photos of it fitted will follow.

          Glad you like the photos.

          Mike

          Comment


          • #6
            Re: Mike's Cabrio Build

            Originally posted by terryreed1664 View Post
            Here here, Peter. This is brilliant, more please.

            Terry
            Thanks Terry for the encouragement - I did wonder if it was a bit - I don't know, say, conceited, to post my build up on here. But this is just what I want others to do, to get over the "Great British Reserve" and post their build up here and share their fun with us all.

            I know from my own experience I have often taken something from a detail in someone else's photos.

            Robert set the ball rolling, I've picked the baton up, how about Scott with your Berlinetta re-build joining me?


            Once we get a few going, I hope more will join in?
            It doesn't need to be a full on build/rebuild. The engine conversions are really interesting major project that will be of interest to a lot of members, maybe there's someone out there with a photographic record of what they have done?

            Photos are just so interesting and useful - share them !
            Last edited by Mike; 04-04-13, 02:29 PM.

            Comment


            • #7
              Re: Mike's Cabrio Build

              My kit arrived (late) from Marlin on April 14th 2006.

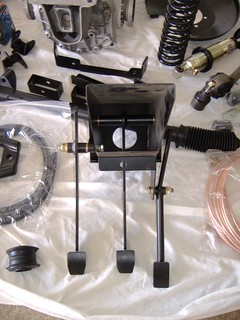
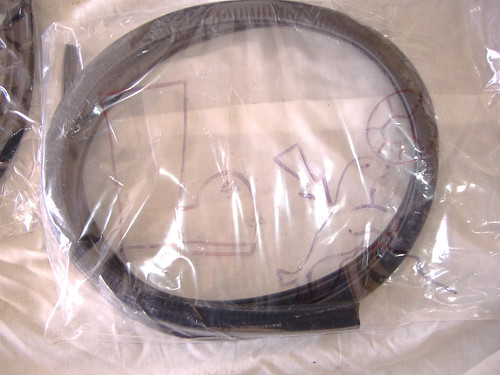
              Some of the parts I recognised - the (infamous) Marlin Pedal box


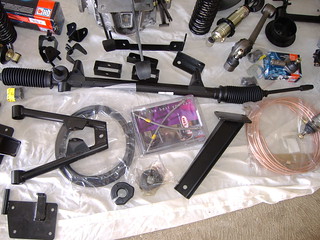
              .......and things like the top wish bone (with rounded tube for SVA), engine mounts, and alternator bracket. Others I found out later were rear damper brackets, gearbox supprot bracket, and wishbone brackets to the chassis.

              I did not buy the "Kit in a box" from Marlin, so these photos show a mixture of Marlin supplied items and those that I had sourced prior to delivery of my kit.


              .............others were amusingly labelled by someone who must play charades!


              .....but then, there were others that I could not work out?


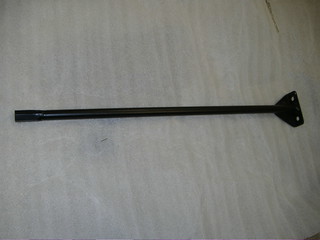
              ...............it looked like a steering column extension, yet did not appear to marry up to any part of my Sierra column? I could not understand how I was supposed to make it fit. One end was clearly designed to bolt to something through two holes, whilst the other had a long hex shaped nut welded on. Was I missing something?

              This was the beginning of getting to know Terry at Marlin!...............
              Last edited by Mike; 04-04-13, 03:35 PM.

              Comment


              • #8
                Re: Mike's Cabrio Build

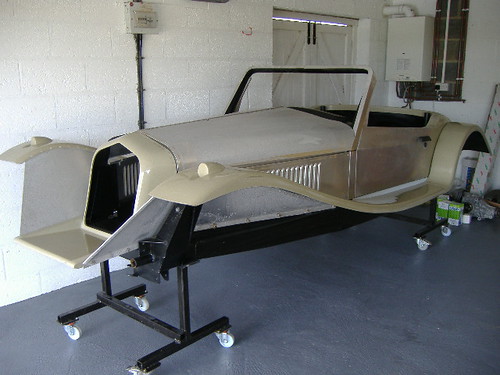
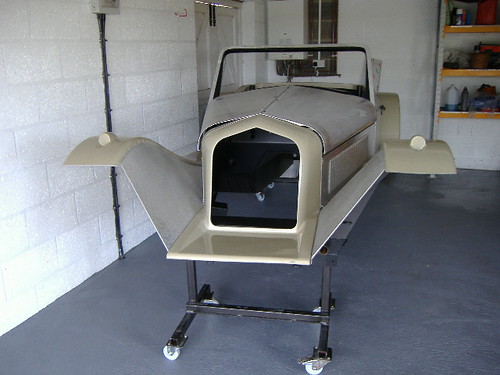
                Whilst Marlin were taking their time to manufacture my chassis I decided to paint my garage walls and floor for the new arrival - it has never looked this clean since since!

                Sadly, I do not have a photo of the bare chassis on its own - (I was too excited to wait to see what it looked like with the panels bolted back on the chassis!


                I made the mobile trolleys with bits of scrap box section and £50s worth of new castors. They have been fantastic. In fact the chassis went on to the trolleys on its arrival*, and did not come off them until it was time to go out and road test it for the first time 6 years later!
                * - after I had added an extra 150mm in height to the rear trolley as I did not realise the chassis rail kicks up at the rear!


                Even at this stage there were disappointments with Marlin's attention to detail:
                (the photo below is slightly out of order, but is shown to highlight the twisted nose cone).
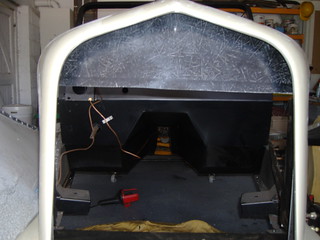
                The bonnet does not appear to fit too well at this stage, but drastic preparation is the key - more later!)


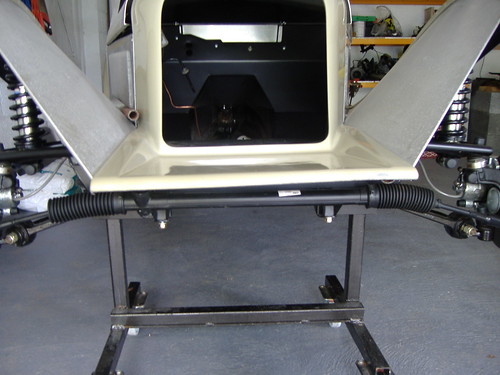
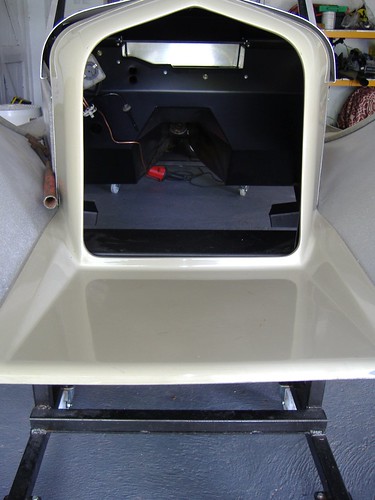
                Marlin tell you in the Cabrio manual that the build centres around getting the nose cone set up correctly: a blind man could see that the front apron is clearly not parallel to the horizon! This was compounded by them grinding too much off the front return on the near side............ (6 years later I finally scratched that itch!)


                The grille lower face is around 10mm out of parallel with the front chassis cross member - but there is nothing that can be done about this, as to try and solve the problem only rotates the whole nose cone out of plumb.
                (Have a look at other Cabrios more closely now...!)
                Last edited by Mike; 04-04-13, 07:28 PM.

                Comment


                • #9
                  Re: Mike's Cabrio Build

                  Like most new builds the easy bit is adding the suspension, so my build progressed to:


                  Cosworth Sierra larger 260mm vented discs.
                  (Note the nut covers required by SVA)


                  Rear suspension showing the route of the handbrake cable - this was my second cable as I cut through the original when I took the angle grinder to my transmission tunnel............!!!!!!


                  - apologies for the poor focus (they are the only shots I have of the early back end): like my computer skills my photos improved with practice!.
                  Last edited by Mike; 04-04-13, 07:42 PM.

                  Comment


                  • #10
                    Re: Mike's Cabrio Build

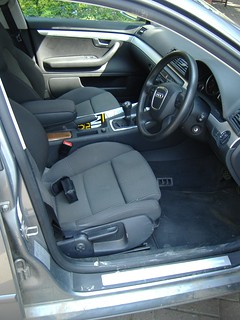
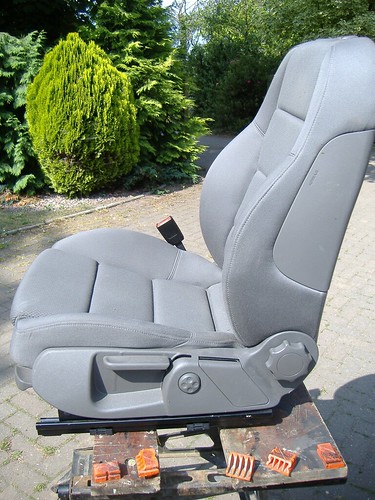
                    With my new job came a new company car - an Audi A4, which I specified with Sports seats. They were the best I've ever had - I could drive for 3-4 hours, go into a meeting, and then drive 3-4 hours home, no problem.
                    That started me thinking.............they would be nice in my Cabrio, I wonder if I can make them fit?????????? After all I want a tourer, and the ability to sit in it for more than 30 minutes was going to be important.


                    A quick measure of the Cabrio's chassis and the Audi seats showed it was nowhere near possible, so don't even think about it................. but I do like a challenge!

                    If I remove all of the levers from the side of the Audi seat, and just narrow the Cabrio's transmission tunnel down to 100mm they might just fit?

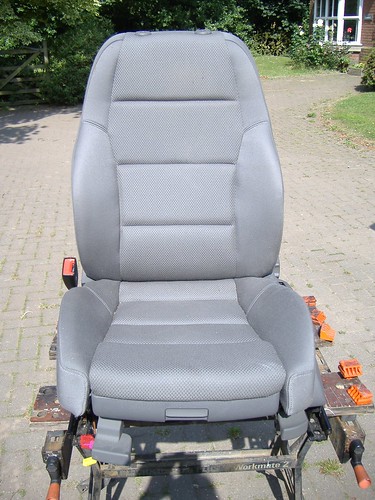
                    Then I saw a pair of Audi Sports seats on ebay going cheap, so I bought them: after all I could sell them if things did not work out....!


                    They were in insanely good condition, but the seller was upgrading to leather seats.
                    More detailed measuring suggested that if I moved the outer slide runner inboard, (one is under the seat, whilst the other sits outboard) and removed the height adjustment system from the outside of the seat (why would I want that with these seats shoe horned in to a Cabrio anyway?), and I squeezed the transmission tunnel right down it would just fit!


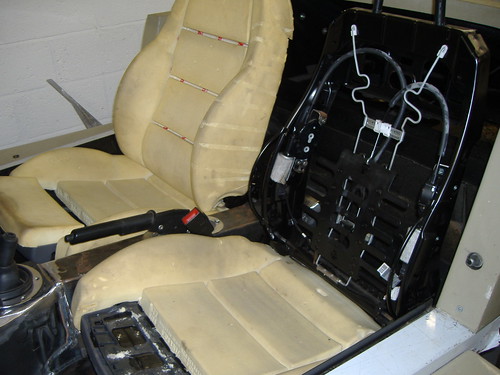
                    The lever is for height adjustment - it had to go. The knob is for back rake, and remains. The electric 4-way rocker button for adjustable lumber support will be retained but located elsewhere.

                    So, for the squeamish, look away now..................


                    I ended up removing the transmission tunnel completely!

                    My original plan was to leave the narrowed tunnel parts in tact, as shown in this photo by the white lines....


                    The white line on the tunnel shows where I wanted to narrow the tunnel on the drivers side, as I had already achieved on the passenger side. However, there was so little left of the original tunnel that it was going to be easier to fabricate a completely new tunnel and weld it back in place.


                    At this stage you would be forgiven for thinking I must be quite mad................!!!!!!


                    Last edited by Mike; 04-04-13, 09:48 PM.

                    Comment


                    • #11
                      Re: Mike's Cabrio Build

                      Really enjoyed reading and looking at the pics Mike, great job! You can expect some pics of my Berlinetta soon. Scott

                      Comment


                      • #12
                        Re: Mike's Cabrio Build

                        Originally posted by scott h View Post
                        Really enjoyed reading and looking at the pics Mike, great job! You can expect some pics of my Berlinetta soon. Scott
                        Scott I am pleased to hear that you'll join in. I really don't want this to be just my build, there must be loads of other members who have a story to tell, and photos just make it so much more interesting.

                        I hope you are interested in the wider seats, and the structural alterations I've chosen to make to my chassis, as I have the twinkle of a new project for the future that might be of interest to you?

                        As I am approaching the end of my Cabrio build now, my thoughts keep drifting off to the Berlinetta advert I saw 25 years ago, that started my interest off in Marlins. For me, it is the best looking Marlin of all the models. Other members have said the Berlinetta is lovely to look at but has a constricted driving position, so why would I want one when I have a Cabrio?

                        So, I am just toying with the idea and possibilities of widening the rear tub of a Sierra based Berlinetta by 6" to gain more shoulder room (which I understand is how the Sierra based Cabrio project came about.)

                        Of course it may be fanciful thinking, and may never happen, but anything can be done with the right planning and plenty of stamina!
                        Last edited by Mike; 04-04-13, 10:37 PM.

                        Comment


                        • #13
                          Re: Mike's Cabrio Build

                          If possible, I wanted to retain the seat back adjuster knob. The problem was that even if I could make the floor well wide enough the knob was going to be below the top of the transmission tunnel.
                          OK, so lower the tunnel as well.............


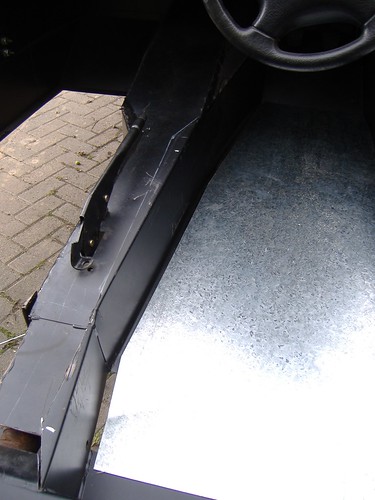
                          Original transmission tunnel removed in the centre, narrowed and lowered from the gearstick to the back cross member.
                          This is making the tunnel very tight both in width and in height. It means I can not tolerate much prop-shaft movement from it's centre line, either side to side, or up and down.

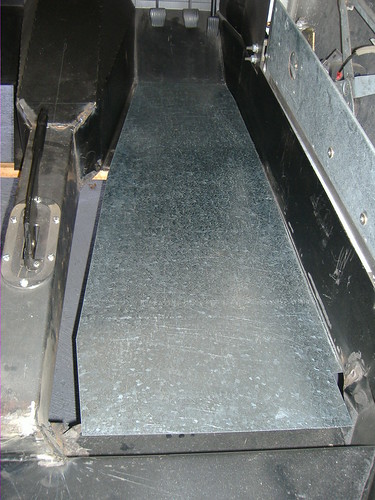
                          This shot shows the new tunnel tacked in place: the old thin gauge galvanised floor illustrates the additional width I will gain. Although the tunnel is straight, the chassis side member funnels in towards the front. My seat will fit, but forward adjustment will ultimately be limited by the narrowing width : at this stage I do not know exactly where that will be!


                          At this stage I also decided my welding skills with a stick welder were not good enough!

                          The very observant will have noticed I have completely ground away the seat belt anchor point open the drivers side rear corner. The Audi seats have the seat belt anchor point attached to the runners, so they move for and aft as the seat is adjusted, and I needed the width to allow my seat to go back the maximum distance possible.

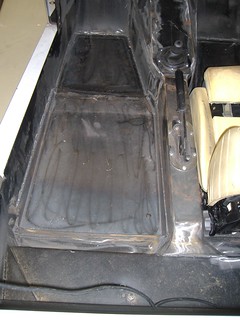
                          When I built my Roadster Marlin sold seat recess pans. Obviously using a conventional seat like the Audi's was going to lift the seat base, so I decide to make my own recesses. At this point I had been a mile down the road to our local fabrication engineers, and this opened up the scope to make a much better finished car.
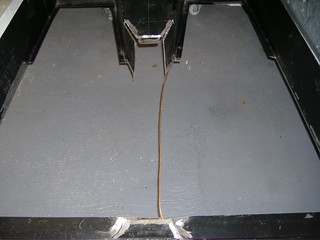
                          I made some sketches up of a recessed floor pan, and detailed all the dimensions. It was then fun to go to the workshop, and guide one of their guys through cropping the 2mm plate, and then folding it in a huge press, into giant baking tray styled pans.

                          Once I was sure they would fit I took the complete chassis, (on the front of an agricultural forklift! - my father is a farmer) back to the workshop to get it fully welded.
                          And whilst at it, I had all the seams fully welded as Marlin only stitch weld the Cabrio tunnel, which was bound to cause rust and leak problems in the future.

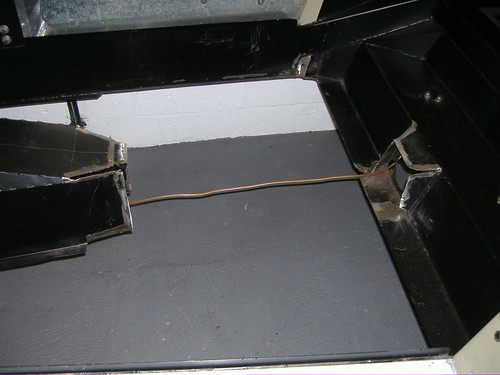
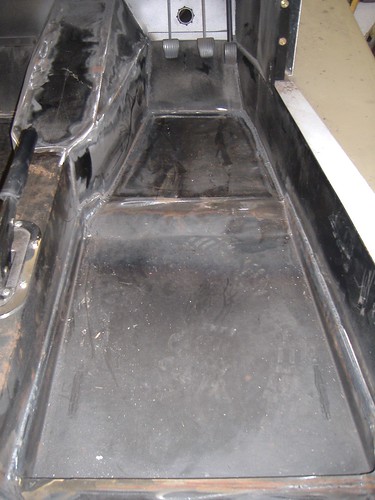
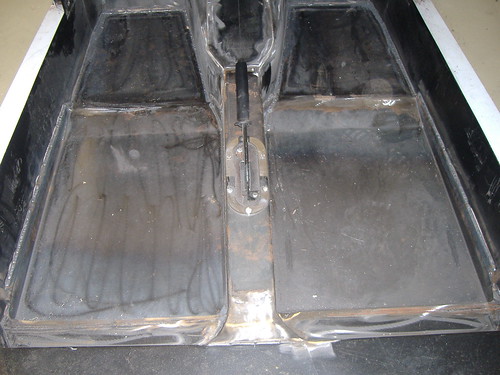
                          And this was the result:


                          They made a fabulous job. Their welding is so neat and clean (MIG or TIG?) that it did not require cleaning, and with 2mm plate it is infinitely stronger than the Marlin supplied thin gauge galvanised sheet which they recommend pop riveting in.
                          The foot well is a piece of flat plate. The seat well I designed to be recessed 25mm at the front, and 60mm at the rear. These dimensions were all theoretical calculations at this stage, but if it worked out, it would be as low as I wanted with the seat right back, and rise for a shorter person as the seat came forward. Well, that's the theory.....?!


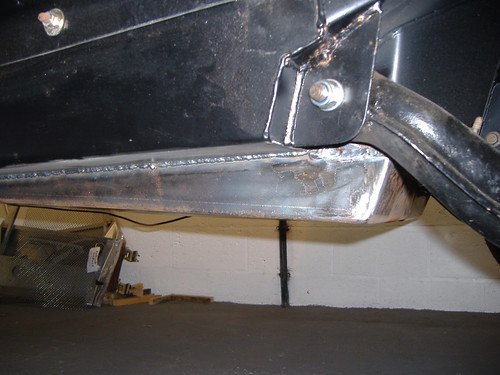
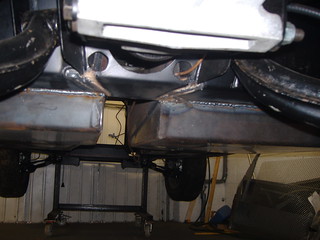
                          This shows the recess projecting below the chassis rails. I know it will reduce ground clearance, but I reckoned at 60mm it would be less than many Cabrio under floor exhausts.
                          More importantly lowering the seats means it will pass the SVA rule that the seat belt must not come into contact with the seat back, unless it is designed to accept the loads that will result. The Audi seats were not designed for any upper loading so it was important to get the heights right.


                          This is a view down the transmission tunnel from the rear - - there is not much room for a prop-shaft and exhaust!


                          It is still a tight fit! Even at this stage I was not certain the seat could be positioned to allow it to slide on its runners!


                          Both seats offered up.........


                          The seat frame and padding have remained totally standard - I will leather over the side air bag panel to hide it. The only conversion necessary was to alter the seat runners as one of them is outside the width of the seat base, and the knob to adjust the seat back rake has to be trimmed down to fit the width availabe. The squab and back are completely standard.
                          Visible are the motors to adjust the lumber support.

                          To determine whether all this worked I had to install the diff, and prop shaft to see what the real clearances were:


                          These are the notes I made at the time:

                          Standard 3.62 diff sand blasted clean, and new joints fitted. The diff did not line up with the holes Marlin suggested, but you go with your own intuition to centralise the prop. I had to be very accurate with the centre as I've narrowed my transmission tunnel down to only 90mm internally.
                          I would like to fit a 3.14 diff, but these are very hard to find: I may well settle for a 3.38 and have a 5% higher profile tyre.

                          Edit Jan 2012
                          I only came across one 3.14 diff for sale in two years and it made over £350 on ebay! I eventually found an early 3.38 diff in very good order for less than £100, cleaned and new seals fitted.
                          I have since added 215/55/16 tyres and rims, which are very close to providing the original gearing of the donor BMW.
                          Last edited by Mike; 05-04-13, 12:27 PM.

                          Comment


                          • #14
                            Re: Mike's Cabrio Build

                            Once I had satisfied myself the seats would fit, I turned my attention to the body work.
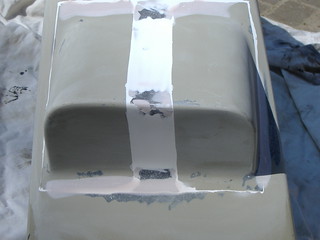
                            Over 20 years ago I bought a pair of Volvo P180 rear light clusters (The Saint's car - remember him? Simon Templar/Roger Moore?). The Marlin pods are not wide enough to accept them, so I cut the pods out whole, then cut them in two, added 40mm, and glassed them back in again.


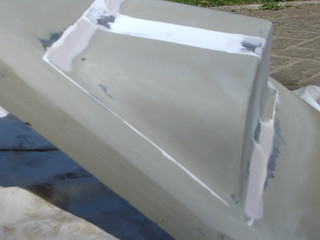
                            I have always preferred proper side lights over the Marlin front molding, so I cut them out, and glassed the hole over:


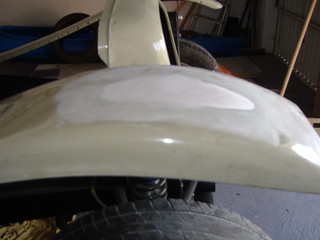
                            Whilst in GRP mode I added a GRP blanking plate to the nose which I can trim back to fit the top of my radiator later. A lot of Marlin owners complain about over heating, so being a great one to learn from others, I am making sure air is forced through the radiator, and not allowed to escape over the top of it:

                            Last edited by Mike; 05-04-13, 03:52 PM.

                            Comment


                            • #15
                              Re: Mike's Cabrio Build

                              Now we get to the exciting bit - for me anyway!

                              The engine:

                              I took a long time researching BMW engines.
                              I wanted to go as modern as possible, to get the best fuel efficiency, but my research found that there were insurmountable security system problems (EWS) built into the electronics of anything after the M52B25. There were also issues with early M52s having Nikasil bores which were susceptible to wear from high sulphur petrol in the UK.
                              So after 4 BMW breakers all told me the same story, I concluded the M50TUB25 (with Vanos - variable valve timing on the Inlet cam) had a good fuel injection system, was ultra reliable, and did not have the EWS problems to deal with.

                              Marlin had built a Cabrio demonstrator with the M50 engine , and one member, Chris Cunliffe, in Devon, was building a Cabrio with this engine.
                              I tracked down the owner of the original demonstrator, and invited myself over to have a look at the installation - it sounded gorgeous. I also contacted Chris at what turned out to be a very good time, just before his SVA test. He had been able to fit the engine, and without too much difficulty*. Once he had passed the test, we both drove for three hours to meet up in Cirencester, (me from Lincolnshire, Chris from Devon!) for me to have a test drive of his new pride and joy - (Kit car enthusiasts are nuts at times!) I could not stop grinning as I drove it - it was beautiful, and just what I wanted to build.

                              So that was my decision made M50TUB25 - 192BHP, 6 cylinder silky smooth engine, 5 gears, and I could expect reasonable fuel economy on long runs.

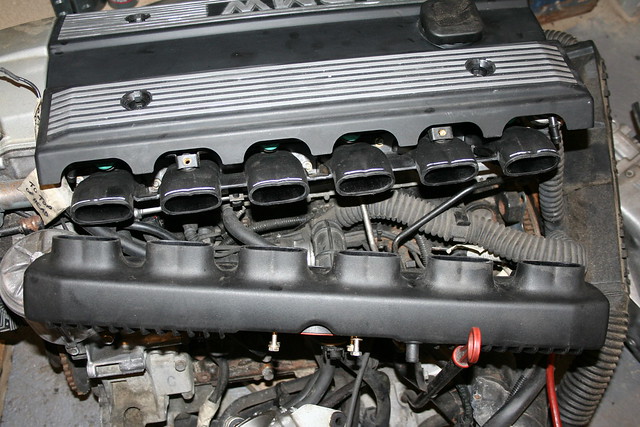
                              There was however, a piece of major surgery required to make the M50 fit a Cabrio engine bay - can you see it?


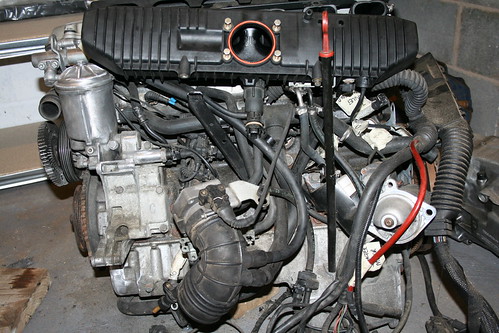
                              BMW M50TUB25

                              I spent a long time searching for a low milage crash damaged BMW, to find an engine I did not need to strip down. I visited several breaker's yards until I came across this. It had only covered 67,000 miles, with one careful lady owner (until she hit a bollard, and broke the front timing pulley, so the car was written off). Shame, really as it could easily have been put back on the road. I heard it running in the dismantlers yard, and it was quiet - M50 engines can have a "Vanos rattle" if they are not looked after, or are high milage and I had heard a few on my travels, but this one was very quiet.

                              I deliberately left all the wiring and pipes in situ to know where they go later.
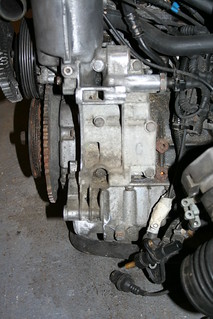
                              Note original lower alternator support casting - it gets removed later.


                              Old Alternator Mount -above
                              and removed - below


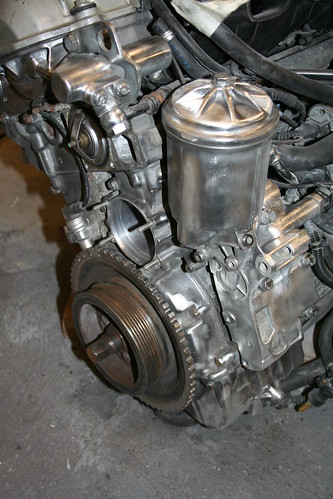
                              I am not a fan of engines with too much paint on them, so I cleaned and polished the alloy bits - with a stainless steel wire wheel on a drill (do not use mild steel as it reacts with the alloy)

                              As BMW heads are alloy, they will not tolerate being cooked, and the M50 has a plastic water pump which is prone to failure after a while, so I took the opportunity to fit a steel impeller pump and new thermostat and housing.
                              The engine is a very tight fit in the Cabrio bay, and has to be off set to the near side to allow the cant of the engine to fit on the off side. The alternator has to be relocated from the near side, to the offside, and the original lower mount can be ground off to help with the space constraint - but this is the easy bit!

                              * And the dramatic bit?

                              - the inlet manifold has to be cut across all 6 runners, and 75mm removed, before re-sleeving it back together - This build is not for the faint hearted!!


                              Is there anyone still interested in my build?


                              Last edited by Mike; 05-04-13, 03:10 PM.

                              Comment

                              Working...
                              X