Announcement

Collapse
No announcement yet.

Mike's Cabrio Build

Collapse
X
 
  • Filter
  • Time
  • Show
Clear All
new posts

  • Re: Mike's Cabrio Build

    You are are all better at the one liners than me - I did consider suggesting it gave a nice "crisp" exhaust note!
    I think the potatoes were Maris Piper - oooh groan!

    I particularly like the 'Chipped' quip!

    .....but it proved the idea....... and that it is worth investing in some smaller diameter inserts.

    Comment


    • Re: Mike's Cabrio Build

      Originally posted by cameronfurnival View Post
      Is it April 1st
      Hi Cameron

      Have you heard the one about a guy using bread to ease his gearbox/fly wheel spiggot bearing out?

      I thought it was a wind up, but John Tootle, who is making a beatiful job of restoring a Marlin Hunter into a much better Cabrio has used the technique: keep compacting bread into the centre of the bearing and use the build up of pressure to force the bearing out - it clearly works!!
      Is there no limit to what we Marliners can achieve?!!


      More details here:

      Comment


      • Re: Mike's Cabrio Build

        Hi Mike . Quieter motoring and a snack at the end . Win win. David

        Comment


        • Re: Mike's Cabrio Build

          Perhaps he learned that trick on a Sandwich Course at College ;-D

          Comment


          • Re: Mike's Cabrio Build

            Originally posted by tony.stott2 View Post
            Perhaps he learned that trick on a Sandwich Course at College ;-D
            Love it!....................still chuckling!

            Comment


            • Re: Mike's Cabrio Build

              My age shows methinks!!
              Getting to the end of the big sort, still no trace of other bmw stuff, will probably throw in the towel and send the bits I have found on!

              Comment


              • Re: Mike's Cabrio Build

                New potato wedges.......................

                Spurred on by my potato wedge "loudness reduction experiment", I ordered two new stainless reducer tubes. These are sized to fit snugly inside the exhaust tail pipes at the box end, but then reduce the tai pipe bore form the original 55mm down to 35mm:

                Copy of IMG_6370.JPG

                Copy of IMG_6375.JPG

                A loose test (with them just pushed up the current tail pipes) suggests that this will reduce the noise by around 2db, at 4000rpm.
                This does not sound much, but each 3db drop represents a halving of the noise, so if it does convert into a true 2db reduction, I'll be pleased.

                Using my school boy trigonometry, two 35mm I/D tail pipes will have a combined sectional area of 25% more than my current 48mm I/D single centre section, so hopefully they should flow at a similar rate without causing any undue restriction.

                Also, I have redesign plans for my main boxes, and may even add a third centre box, all of which will hopefully combine to bring my exhaust note down to a quiet purr, even at speed.
                If all goes to plan it should drop the level by 5-6db overall.

                I can't help feeling I am bucking a trend here, wanting a quieter car with a smaller bore tail pipe...................... boy racers take note!

                Incidentally, Euro technocrats have already legislated for even quieter cars in the future. Current new car legislation calls for 74db limits, but in 12 years the limit will be only 68db.
                Makes the IVA's current requirement for 99db max look very liberal!

                My Cabrio passed "comfortably" at 96db, and I'm hoping to get it under 90db at the end of my changes.
                Last edited by Mike; 16-05-14, 08:25 AM.

                Comment


                • Re: Mike's Cabrio Build

                  BMW M50 VANOS - Variable Valve Timing

                  The internet is a wonderful resource for finding information easily..............and finding problems too, real or imagined!

                  The following may not be of general interest, but hopefully may help anyone using a BMW M50TU engine in their Marlin in the future.

                  Driving back from Stoneleigh was my first long distance run, and allowed me to get a feel of my Cabrio's performance. Subsequent driving has confirmed my initial assessment that it pulls very strongly over 3000rpm, but I feel is disappointing below this band.

                  Trawling through the BMW forums was both reassuring and worrying.
                  The M50, with its steel block straight 6 cylinder design has been refined through almost 2 decades such that it is incredibly robust, often exceding 200k miles. However, with the M50 TU (stands for Technical Upgrade) BMW introduced their first variable valve timing system - VANOS. This is designed to improve the power delivery over a wider rev range, and improve fuel efficiency.

                  70e261c4-316d-0bad-ddf1-ff1e67429ceb.jpg

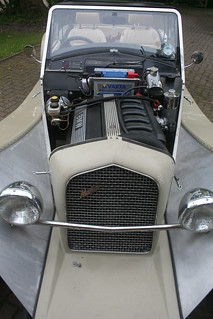
                  The Vanos unit bolts to the front of the head and is the bulge on the right side when viewing the engine as above.

                  VANOS works by applying controlled oil pressure on a piston which acts on a helical gear set to vary the angle of the Inlet camshaft relative to the Outlet cam/crank.
                  When new it works well and performs as designed.

                  However, having trawled the BMW forums, looking for why my engine was less strong below 3000rpm, it became clear very quickly that there is a design weakness in BMW's VANOS: the oil pressure seal is made of inappropriate material, and is usually worn out by around 70k miles. This allows the helical gears in the Inlet mechanism to oscillate in and out against the Vanos piston producing the commonly known "VANOS rattle".

                  There are a couple of remedial actions which can be undertaken with the M50TU Vanos.

                  The first is to buy a new BMW vanos unit - very expensive!
                  Secondly buy a refurbished unit from an after market supplier called "DrVanos" at a more reasonable cost (Very good apparently, but still £250).
                  Thirdly there is a DIY option: Beisan offer a Vanos seal replacement kit which cures 95% of the problem for a much more reasonable total cost of around £30. Better still, the new seals are made of material more suited to operating in oil and heat, so are longer lived than the genuine BMW VANOS units.

                  There are several very good Youtube videos on how to change the Vanos unit, and seals, and it looks pretty straight forward, so this is the route I'll take. The kit from Beisan comprises just two seals, and a new bearing housing:

                  IMG_6512.JPG

                  (- the videos below are 25minutes long, but if you want to know what to do are very good)

                  Vanos Removal
                  Enjoy the videos and music that you love, upload original content and share it all with friends, family and the world on YouTube.


                  Vanos Install
                  Enjoy the videos and music that you love, upload original content and share it all with friends, family and the world on YouTube.


                  BMW were quickly aware of the "Vanos Rattle" and introduced an upgrade in the M52 single vanos engines, changing the single plate No. 9 in the M50 to 3 plates Nos.9, 10. & 11 in the M52.


                  M50TU Vanos


                  M52 Vanos


                  As with a lot of BMW developments this upgrade can be retro fitted to the M50 provided the longer studs (No.6) are used too.

                  The improvement comes from the "Cup Washer" No. 10 which is a compressed dish plate between two flat plates No.9 (2mm thick) and No.11 (4mm thick), and helps to stop the cam advance oscillating. It has continued to be fitted to all later BMW heads, so presumably does work.

                  Ironically BMW charge less than £4 for the new cup washer plate No. 10, but wanted over £30 each for the two flat plates (Nos. 9 & 11) - so I sourced a pair from a BMW breaker for £10 delivered!

                  IMG_6511.JPG

                  Of course things are never quite as easy, or as cheap, as you first think, and I've ended up buying a raft of genuine BMW cam cover gaskets to replace the old ones when I make the upgrade as the plastic gaskets become brittle and fail on removal:

                  IMG_6499.JPG

                  My expectation is that these upgrades will help improve the low down torque, and eliminate an odd "rattle" I can hear in my engine around 2700rpm - by all accounts a classic Vanos seal failure symptom.
                  Last edited by Mike; 06-06-14, 11:10 PM.

                  Comment


                  • Re: Mike's Cabrio Build

                    Hood Preparation

                    Although sourcing my hood is frustrating I have made some progress.
                    After waiting to see how Chris Bogue got on with his low cost hood, I have decided to source mine from my local trimmer. Its taken longer than expected because I had not prepared the hood to the point where he required it to be to take all the measuremnts, so its mainly my own fault!

                    However, I have now:

                    Made a stainless steel back plate to hold the hood down to the rear tub:

                    IMG_6605(1).JPG

                    This is made in 3 sections to make it easier to adjust. I've welded the set screws to the plate, making it an easy job to tighten nuts when fitting.


                    Made tension wires to hold the hood down over the side windows:

                    IMG_6606(1).JPG

                    Several Cabrio owners have suggested that the velcro in their Marlin hoods fails over time. My upholsterer suggested I fit tension wires as an alternative - apparently Ford through to Bentley use this technique. It seems to make sense to me, so I'm giving it a go. Its a piece of bicycle inner brake cable (£1.79 from Halfords), cut to length, with a small electrical copper sleeve squashed really tightly (in a vise) on the cut end. I had hoped to solder it, but cannot make solder stick to stainless.

                    All that remains now is to fit the over centre latches to the front rail, and I'm ready for a made to measure, and tailor fitted, hood.

                    Then finally I can get my seats put back in and go out when ever we wish............!
                    Last edited by Mike; 02-07-14, 07:47 PM.

                    Comment


                    • Re: Mike's Cabrio Build

                      Hi Mike,

                      Wow, what a job, I have just read this thread from start to well erm here (over a period of days) lol.

                      You must be and should be very proud of yourself.

                      Lovely car!

                      I will be following this project from here on.

                      Dan.

                      Comment


                      • Re: Mike's Cabrio Build

                        Thanks for the compliment/encouragement, Dan, I'm pleased so many people have gained pleasure from my attempts to record a Cabrio build. If it inspires just one person to have a go themselves then I'll be delighted.

                        I have enjoyed keeping the diary almost as much as building my Cabrio, learning quite a lot about how to use IT as well as building a car!

                        My wife tells me I am not allowed to build another kit car, so I guess there will have to be a lot more development go into this one!
                        So.............. does anyone have a Sportster chassis that I could use as a base to make a Cabrio with the Sportster's much neater front suspension arrangement, but still retain the Cabrio's practical windscreen, and electric side windows........?

                        I still hanker after a cabrio with the chassis that Gerry Haines specified, with double front wishbones and the coilover fixed within them,like this:

                        DSC_0127.JPG


                        Mike
                        Last edited by Mike; 02-07-14, 07:44 PM.

                        Comment


                        • Re: Mike's Cabrio Build

                          Getting my hood made is proving a little tedious - the consequence of asking someone to make it "in his spare time", and both of us working full time and having other committments at the weekend. We've finally agreed it will be easier if we leave it until he is on holiday in August and has more time to finish it properly in one go.

                          So, I can finally get on with taking my engine to bits - I'd already bought the Vanos repair seals and bearing kit, but had held off as I was never sure when I might have to take my Cabrio round to the upholsterer.

                          Let the fun begin:

                          Two bolts and the bonnet came off.....


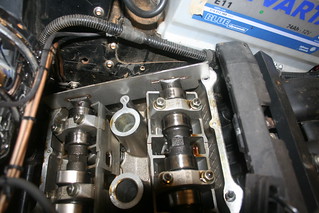
                          Then the cam covers were pretty easy.....


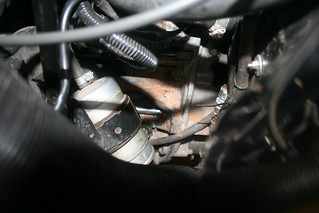
                          Not easy to see or get at, but crucial in preserving the timing set up as its impossible to see the timing marks with the pump and pipe in the line of view from above, and of course the radiator is blocking the view from the front.

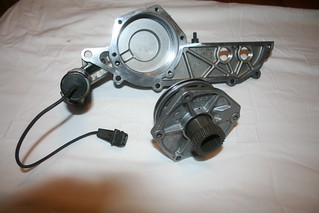
                          But once I had made myself the specialist tools to hold the cams and crank, and then a sprocket turner the vanos unit came off quite easily, and I could dismantle the unit to get at the seals:


                          The plunger in the foreground hydraulically operates the change of cam timing, but as the seals wear its operation deteriorates, having a detrimental effect on fuel consumption and performance at lower rpm. If allowed to get really bad it causes the dreaded "Vanos Rattle".
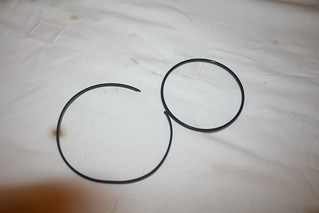
                          The Beisan kit comprises two O rings and a special bearing ring - though its not a bearing at all, rather a spacer between two thrust bearings which makes it very tolerance critical.


                          The old O rings plasticise, and wear flat allowing a loss of hydraulic pressure: and redudes the effectiveness of the Vanos unit.
                          Last edited by Mike; 28-07-14, 10:00 PM.

                          Comment


                          • Re: Mike's Cabrio Build

                            Beisan have prepared a brilliant Vanos procedures site, with photos of every step of the way, to help repair the Vanos unit.
                            This is a copy of one of their photos showing the different types of play - Radial is necessary, Axial is not.

                            Vanos Play.jpg

                            Although my plunger seals were in better condition than I expected there was some axial play which is likely to lead to Vanos rattle.

                            Beisan then show step by step how to take the Vanos plunger apart - I'll only show the important milestones from my experience:

                            In order to undo the back plug the Vanos plunger has to be held in a vice - to avoid damage Beisan suggest buying their rubber vice covers, I'm sure they are good, but I used 1" x 1" wooden battens which are just as effective:

                            Vanos in vice.jpg

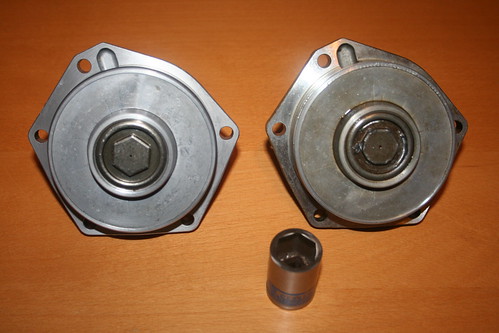
                            The rear plate of the Vanos unit has a shallow hex head, and Beisan advise using a socket with the standard bevelled edge removed, again they offer to sell you one - and they are right to - I stripped the corners off mine trying to use a standard socket - I had to drind the bevel off to remove the back plate! Beisan certainly know what they are talking about!

                            Vanos in vice - plug.jpg

                            Once the back plate is removed there is a torq screw to be removed - but it is LEFT hand thread - again I know as I could not get it undone - because I was tightening it! - but if I had read Beisan all the way through I would have known not too!

                            The critical part of the Vanos bearing arrangement are the two thrust bearings, the internal spacer, the external bearing case, and the two thrust washers.

                            Vanos internal bearing components.jpg

                            The relative heights of the inner spacer and the outer casing are crucial to the axial play. The outer casing is the part Beisan recommend replacing:

                            Vanos bearings.jpg

                            I followed the Beisan procedure, by replacing the outer bearing case, which allows a tighter tolerance on the upper and lower thrust bearings, and it improved the axial play considerably.
                            There was still a hint of axial play remaining, and the helical gear was able to spin freely. Beisan tell you in their procedure that there should be no axial play and the gear should not spin freely, but should just have some resistance - pre-load they call it. They then even tell you how to remove this by rubbing the outer case on 400 grade Wet & Dry for 10 seconds, then rotate through 90 degrees and repeat. I was sceptical a hardened steel bearing case could have any significant material removed by W&D in just 20 seconds - but again I was impressed by the assembled result.

                            I now have a a Vanos unit that has some slight resistance to rotation, there is no axial play, yet radial movement is possible. I have every confidence this is now set up the way Beisan suggest is optimum for the Vanos unit.

                            I have to say I am very impressed with what Beisan know, and have been able to share with their users in very graphic detail: thoroughly recommended!

                            PS - these are only a few of their photos.

                            I'm away for a weeks holiday now, but would love to be able to continue with the rebuild! It has been fascinating to understand how variable valve timing works.
                            Last edited by Mike; 23-07-14, 04:25 PM.

                            Comment


                            • Re: Mike's Cabrio Build

                              Whilst I am installing the Vanos repair seals and fitting the Anti rattle ring, I also decided to add the BMW Vanos upgrade from the later M52. This is the beauty of working with BMW engines, that many of the components are retro-fitable from later models. Once again, the whole procedure is set out on the excellent Beisan Procedures site.

                              The original M50 Vanos arrangement:


                              BMW recognised that their original M50TU Vanos had oscillation resonance issues caused by the cam lobes acting on the valve/springs, so introduced an improvement on the M52:


                              BMW added a cup washer/spring (No.10) between two flat washers (Nos.9 & 11) to dampen this oscillation.
                              This presumably worked well, as all subsequent BMW Vanos heads now have this three washer arrangement.

                              It is a fairly simple retro -fitable upgrade to the M50, requiring the three longer studs, (No.6), and the three plates, Nos 9, 10, and 11.


                              IMG_6511.JPG


                              The cupwasher/spring plate costs less than £4 from BMW, so I bought a new one, but the other two plates are machined to a high tolerance surface finish so BMW ask over £30 each!
                              I bought a pair of these plates from a BMW dismantler for just £10. As they do not wear, they are as good as new.

                              I am not sure if all these Vanos changes will noticeably affect the performace of my engine, but I am very hopeful it will quieten down the under bonnet engine sound and get back to that lovely BMW straight 6 purr!
                              Last edited by Mike; 28-07-14, 11:39 AM.

                              Comment


                              • Re: Mike's Cabrio Build

                                Should anyone build an M50TU engined Marlin - I'll pass on a tip - be careful with the Vanos backing cap/nut!


                                The cap at the back of the Vanos piston is difficult to remove - for two reasons:
                                The 'nut' depth is very shallow, and also the cap is torqued up very tight.
                                A special 18mm socket with the bevelled edge removed is absolutely necessary - I tried without, and promptly stripped the corners from the nut on the right!
                                I then had to use a punch to start the cap unscrewing.


                                I bought a second complete Vanos unit for £15 from ebay, (so I now have a spare Vanos solenoid), and ground the bevelled edges flat on my own 18mm socket. I also gently heated the aluminium piston, whilst cooling the steel cap/nut with cold water: even then the socket has to be held firmly against the cap whilst rotating it, but with the heat, it will come off without damaging the nut edges.


                                With the new cap torqued up after removing a couple of thou from the bearing case depth, the movement in the bearing seems perfect - no axial play, while radial movement is just possible, and pre-loaded perfectly so that there is just slight resistance to rotation. All in all I am really pleased with the way it has finally turned out.


                                I soaked the inner seal in warm water and it went on easily. I then cooled it down in the fridge for 10 minutes, before heating and fitting the outer seal - it went on much easier than I had been led to believe.
                                I'll put it in the fridge prior to inserting the piston back into the Vanos cylinder to help shrink the seals and hopefully make it easy to install.
                                Last edited by Mike; 04-08-14, 11:05 AM.

                                Comment

                                Working...
                                X