Announcement

Collapse
No announcement yet.

DRL152K Marina based roadster rebuild

Collapse
X
 
  • Filter
  • Time
  • Show
Clear All
new posts

  • andyf
    replied
    Re: DRL152K Marina based roadster rebuild

    Loving the build thread. Which servo and master cylinder combination are you using?

    Leave a comment:


  • martinclan56
    replied
    Re: DRL152K Marina based roadster rebuild

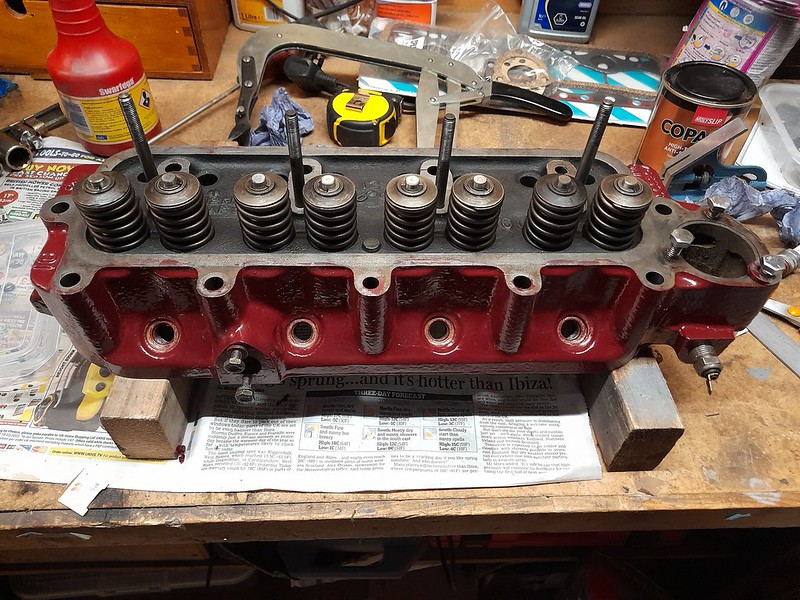
    I have now completed the dissassembly and reassembly of the head. It's now resplendant in MGB maroon which I understand would have been the original colour. Everything looked pretty good. The head has been gasflowed to what I suppose is stage 2. I am no expert but it looks pretty much as Peter Burgess describes in his MGB tuning book with the exception of hardened exhaust seats which it doesn't seem to have. Which leads me to think all the work on it was done many moons ago.
    stripped_head by Robin Martin, on Flickr
    reassembled_head by Robin Martin, on Flickr
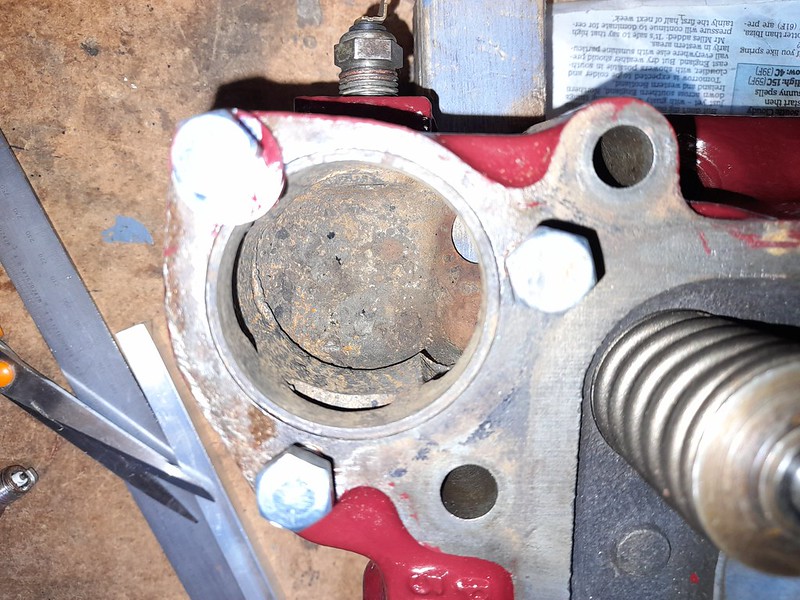
    During the strip and reassembly process I also cleared out all the waterways by blanking off the thermostat position and filling it with a solution of Rust Destructor and letting it soak for several days. It seems to have done the trick.
    derusted by Robin Martin, on Flickr
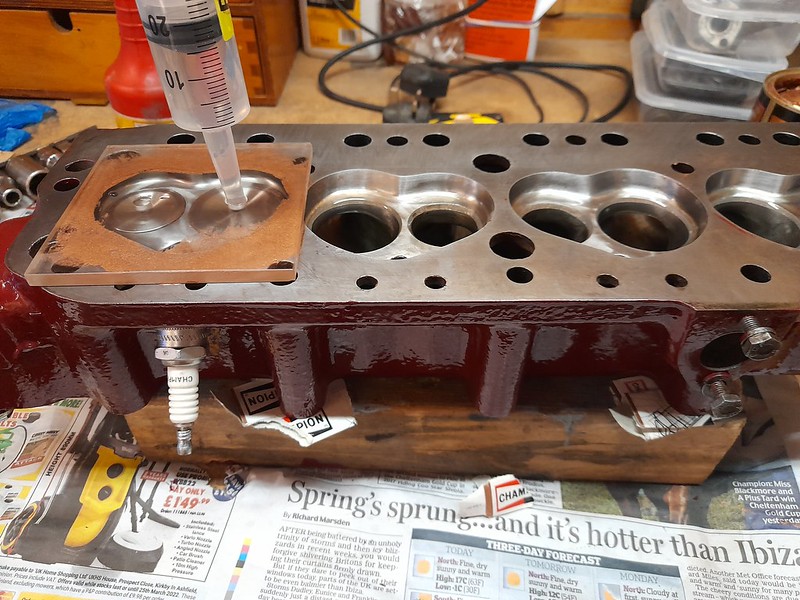
    While I was at it I also measured the combustion chamber volumes so I could work out the compression ratio.
    combustion_chamber_vol by Robin Martin, on Flickr
    Using the formula in Peter Burgess's book:

    Engine size with +30 overbore = 1834cc. Cylinder swept area = 458.5cc
    Combustion chamber volume as measured = 41cc
    Clearance volume = 6.5 + 2 + 4.5 + 41 = 54cc
    Compression ratio = (458.5 + 54) / 54 = 9.49

    While I was at it I though it would be fun to work out the potential 0 to 60 time. Again using a formula from Peter Burgess.

    0 to 60 = (2 x W / T) to the power of 0.6
    W = weight – say 750 kgs = 1650 lb
    T = torque – say 120 lb/ft (figure from Peter Burgess book for an engine with similar configuration)
    0 – 60 = 7.3 seconds
    So - no slouch then....

    Cheers, Robin

    Leave a comment:


  • jon_wilkinson
    replied
    Re: DRL152K Marina based roadster rebuild

    Such a good feeling when you take a bit of a risk and it pays off. Hope the bottom end turns out as good as the top.

    Leave a comment:


  • martinclan56
    replied
    Re: DRL152K Marina based roadster rebuild

    Never buy an engine from ebay and someone you don't know were the words echoing in my head as I handed over my hard earned.....
    Anyway the story is BMC 1800 engine (Marina, MGB etc.) for sale on Ebay. It had an almost unbelievable spec with a Vulcan gas flowed head, Piper camshaft etc etc and had never been run since its rebuild. Of course I smelt a rat particularly as it had had a quick blow over with black paint. Anyway - I persued it and the story had a certain ring of truth. Advertised by an older, and and possibly a bit naive, guy. He had purchased it for his MGB but then found it was originally from a Marina TC and wouldn't fit. The crankshaft spigot bearing is much smaller for a Marina. So he decided to sell it on Ebay and, not suprisingly as it wouldn't easily fit an MGB, hadn't had a lot of interest. So a bit of negotiation ending up in a price that was far less than what just the head was worth and the engine was mine. He even delivered it.
    Today I couldn't resist any longer and started the checking process. The plan is to dismantle and re-assemble it anyway not trusing work that someone else has done. An engine built to this spec should have certain features, double valve springs, duplex timing chain etc. And I am pleased to say it all looks good so far!
    The head has clearly had a lot of work - you can see the porting through intlet and exhaust ports.
    engine4 by Robin Martin, on Flickr
    engine3 by Robin Martin, on Flickr
    And it has the requisite double valve springs and duplex timing chain.
    engine2 by Robin Martin, on Flickr
    engine1 by Robin Martin, on Flickr

    The next step is to get it on to the engine stand and pull it apart a bit more. But so far looking good.....

    Cheers, Robin

    Leave a comment:


  • martinclan56
    replied
    Re: DRL152K Marina based roadster rebuild

    I have been making slow progress albeit going a bit from one thing to another.
    The windscreen frame has to be one of the Roadster's main features doubling up as a roll bar. However I was never very happy with it in the "raw" state. It is bent from a solid steel bar with a slot milled on the inside to take the screen. This left very sharp edges and some hollows in it from the bending process. So I have taken the angle grinder and P38 to it. Looks much more acceptable now.
    windscreen_frame2 by Robin Martin, on Flickr
    windscreen_frame1 by Robin Martin, on Flickr

    I have also completed a prototype door. The plan is to use a solid plywood core as in the original Marlin supplied door. However decent plywood is sooooo expensive now I made the proof of concept door from MDF. I have now skinned it in alluminium (left over from the Pembleton build). I am pretty pleased with the result and now happy to take the saw and router to the final plywood version. The latch is from a landrover, modified by removing the outside handle and lock barrel. I was going to use a Morgan latch but they are now over GBP70 each whereas the landrover one is GBP30.
    door_prototype1 by Robin Martin, on Flickr
    door_prototype2 by Robin Martin, on Flickr

    Cheers, Robin

    Leave a comment:


  • etypephil
    replied
    Re: DRL152K Marina based roadster rebuild

    Excellent attention to detail, and motivating me to strip and rebuild mine, when I have finished the bathrooms, and built a bigger garage. Probably over the 2023 / 2024 Winter; one has to have a plan.

    ETA: Those wheels will look great.
    Last edited by etypephil; 22-02-22, 06:04 AM.

    Leave a comment:


  • IDM
    replied
    Re: DRL152K Marina based roadster rebuild

    Great Thread this , where I should be on my rebuild ! Oh time is such a precious thing !

    Leave a comment:


  • martinclan56
    replied
    Re: DRL152K Marina based roadster rebuild

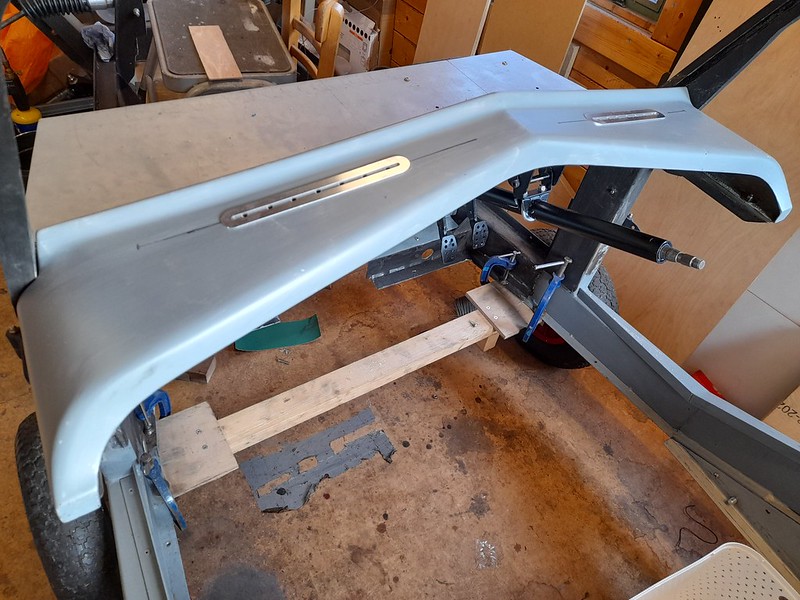
    After a great deal of fitting and re-fitting I finally have the scuttle top in place. It needed a lot of fettling to get it to fit and even now, if I was to be critical, its a little too narrow - it could do with being about 4mm wider.
    scuttle_top1 by Robin Martin, on Flickr
    The front lip, which fixes to the bulkhead also is not flat and had to be pulled into place. I will have to bed it into some sealant when I finally fix it.
    scuttle_top2 by Robin Martin, on Flickr
    I have also bonded in a couple of plenums so I can have windscreen demisters. I have drilled a series of holes in the scuttle top rather than cutting a slot. You can just see them in the first picture with a rather flimsy aluminium surround purchased from the well know kit car bits place, as were the plenums.
    demister by Robin Martin, on Flickr

    Kitchen now almost complete so I hope progress to be a bit faster. One can always hope...

    Cheers, Robin
    Leave a comment:


  • martinclan56
    replied
    Re: DRL152K Marina based roadster rebuild

    I have made a little progress in between kitchen fitting. I have remade the lower steering column mount so it now clears the pedals. While I was at it I bent the clutch pedal so it is a more sensible distance from the brake pedal. (Perhaps the original builder had big feet!)
    steering_column5 by Robin Martin, on Flickr
    And it was pointed out to me that the angle that the steering UJ was running at seemed to exceed the 35deg recommended max. They were right! I have jiggled things a bit, mainly rotating the steering rack, and now the UJ is working within the 35deg. I could probably reduce the angle even further but I thought I would wait until a trial fit of the engine just in case I have to do any more rethinking of the steering shaft.
    revised_steering_shaft by Robin Martin, on Flickr
    Now back to the kitchen fitting.... It's too cold in the man shed anyway :-)
    Cheers, Robin

    Leave a comment:


  • martinclan56
    replied
    Re: DRL152K Marina based roadster rebuild

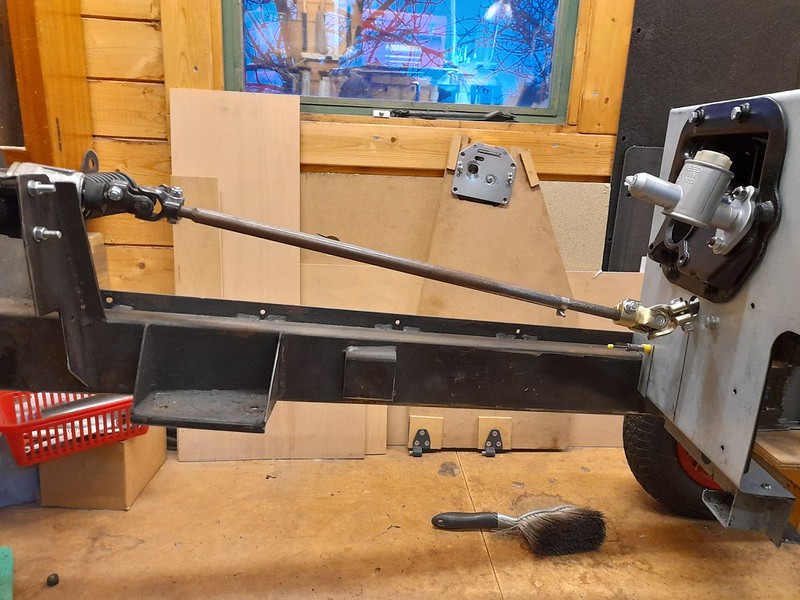
    I have almost (see below) completed the revised steering column arrangement. The column now exits at the bottom of the dash, instead of through it, and the steering wheel is angled at about the same inclination as the dash, instead of being almost vertical.

    The arrangement under the bonnet loooks a bit odd due to the fact that the steering rack is mounted so high in the Marina. But it gives me a nice angle between the lower and upper steering column which the SVA people would be delighted with. The idea is, in a front end crash, the upper steering column is not directed straight into the drivers chest! It should also miss all the engine ancilliaries, fingers crossed.
    steering_shaft by Robin Martin, on Flickr

    From the bulkhead backwards the steering column is mounted on some sturdy, and adjustable, brackets. I made the steering column itself using some Triumph bushes and an alluminium tube. And, yes, the brackets do use exhaust clamps, but after a lot of thinking they seemed the easiest and sturdiest way of mounting.
    steering_column3 by Robin Martin, on Flickr
    steering_column1 by Robin Martin, on Flickr

    I said almost completed.... I was very satisfied with the result until I offered up the pedal box and, despite carefull measuring, found the lower support bracket fouled the brake pedal. Grrrr - the air was a bit blue. Anyway, after sleeping on it I have come up with a slightly different bracket which should be fine. I'll post a picture when I have fabricated it. Which could be some time as my Ikea kitchen is due to arrive Tuesday. I have told the wife it's her Christmas present ;-)

    Cheers, Robin

    Leave a comment:


  • jon_wilkinson
    replied
    Re: DRL152K Marina based roadster rebuild

    I had the pleasure of seeing this in the flesh, so to speak, earlier this week and can attest to the workmanship and attention to detail in the rebuild. Keep up the good work, Robin.

    Leave a comment:


  • martinclan56
    replied
    Re: DRL152K Marina based roadster rebuild

    I have made some good progress on replacing the front bulkhead. The original was rather tired and had a scary crack from pressure from the pedal box.
    cracked by Robin Martin, on Flickr
    I have made the replacement in steel, the same as the rear bulkhead. Proved to be quite tricky getting it right particularly at the bottom arround the chassis members. I have a couple of closing plates to still to fit there.
    The pedal box is also trial fitted. I have made a L & H shaped reinforcement from 25mm angle to help spread the load. The clutch pedal needs a little adjustment using the blowtorch and hammer it seems.
    The observant might notice there are 2 rows of fixings at the top rear of the bulkhead. The original design used the same fixings both to fix the scuttle (dashboard) moulding and secure the bulkhead to a chassis crossmember. I decided to make those seperate thereby improving the strength. I know the fixings are stainless, generally frowned upon for anything structural, but there are enough of them to well distribute any loads. On the final assembly I will also bond the bulkhead using a Sikaflex adhesive - same as I did on the Pembleton.
    front_bulkhead1 by Robin Martin, on Flickr
    front_bulkhead2 by Robin Martin, on Flickr

    Next job: overhaul the steering rack and decide on the position for the steering column. I want it under, rather than through, the dash as in the original design. The orginal Marina steering column is pretty shot so I am thinking of using one from a Triumph Spitfire for which you can still get things like bushes.

    Cheers for now, Robin

    Leave a comment:


  • martinclan56
    replied
    Re: DRL152K Marina based roadster rebuild

    After a lot of delays the zintec steel for my front and rear bulkheads arrived. I am making them from steel as opposed to the original alluminium for strength. The front bulkhead tends to crack arround the pedal box and the rear bulkhead has the seatbelts mounted to it. I was able to use my newly beefed up bender for the first time. As expected the folds are fairly soft but fine for the purpose.

    on_a_bender by Robin Martin, on Flickr

    rear_bulkhead2 by Robin Martin, on Flickr

    It fits considerably better than the original factory made effort - even if I do say so myself!

    Leave a comment:


  • martinclan56
    replied
    Re: DRL152K Marina based roadster rebuild

    I trial fitted the refurbished axle. It is very heavy! I have been pontificating about what dampers to use but Ebay had a special offer on Spax adjustables (20% off) so I spashed the cash and bought both rears and fronts (which are actually Herald rears).

    axle trial fit by Robin Martin, on Flickr

    The only real issue I had, prior to fitting, was the handbrake compensator lever which mounted using some long ago perished rubber top hat bushes. I managed to find an oilite bush of almost the correct size which was a tight press fit and used that instead. Probably better than the original.

    hand brake compensator by Robin Martin, on Flickr

    The only snag, and yet to be resolvled, is the proximity of the handbrake cables to the damper. I think it could well touch when the car is moving. Which probably wouldnt really matter but I guess it would be an MOT failure....

    hand brake cable by Robin Martin, on Flickr

    Next job is to remake the rear bulkhead - which I am going to make in steel rather than the original ally. That's going to be fun - folding 1.2mm zintec. Watch this space...

    Leave a comment:


  • PaulW
    replied
    Re: DRL152K Marina based roadster rebuild

    Excellent work Robin - good to see the progress. Paul

    Leave a comment:

Working...
X